Pants, its what I thought. I got a camera that lauded for its mics but I don’t even need the mic. I’ve owned it for a while now (before getting round to using it) so can’t really return.
We have been wanting a ‘proper’ camera for photos so perhaps I can combine it with getting a DSLR camera  and either ebay the HDR or keep it for a second angle…
1 Like
Seems like you can get DSLR cameras very cheap…e.g Canon EOS 400D
Going for < 100 GBP on ebay
I don’t think the Canon 400D can shoot video. A Canon Rebel 500D should be capable of shooting video.
its a decent camera if you can get your hands on it, it should be under 200.
It is 15 megapixel so its a good entry level DSLR videocam. Good enough for 1080p youtube work with decent clarity. Don’t expect too much from it but it will definitely get the job done even with a stock lens. Might want to pick up a prime and a bigger zoom lens for finer works. Should be all well under 400.
Anyway, back to working with what I’ve got (I may aswell at least try it).
Some questions on lighting:
- How bright should the bulbs be?
- Key lights. So I gather for lighting faces/subjects. In the reference track I posted there is a key light to the left…if there were two people in the shot, should they each get their own key light, or just a single light in their general direction?
If you want a shot like this, you will need around 300 watts of softboxed light (around 5 bulbs) . If you dont have a softbox, you can make one with rice paper or white wrapping paper. Dont put the paper too close the bulb ofcourse. Its basically a boxy lampshade and you can make it yourself with wireframe and paper.
can always buy one ofcourse, good ones run around 150.
a cheaper alternative is wallmart ricepaper lamp
^^ these lamps are ridiculously good and you have the flexibility to add 3 bulbs inside and change their directions as well. I still have about 4 of them around the house in addition to my sofbox lighting kits.
You might get away with 1 light for both subjects.
Keep the light around 2-3 feet from yourself off to the side and keep the room dark. You will need about 8 ft of distance behind so dont sit too close to a wall that can be lit from the light. If some light bleeds to the walls behind put up a shoji screen or stack some moving boxes off to the side of the light to create a dark shadow on the back wall (but without blocking light for yourself ofcourse)
You will need dim ambient light in the back, lit candles and maybe a hidden floor lamp. Makes sure ambient light doesnt reach your faces. Once you have the lighting setup, you will need to find the proper settings on the camera.
Turn off camera backlight and any kind of video enhancements that the camera might be doing, like auto color correct, auto HDR, they are all terrible things for videography.
Goal is to try to find the most natural light you can “drink” from the camera
check the manual for:
If you can control the shutter speed in your camera you will need a moderate shutter speed (around 1/48)
If you can control the aperture, play around with it till you get proper exposure (its better to be underexposed than overexposed)
If you still dont get proper exposure only then add backlight (this is the final resort)
Since your camera is not zoomable, keep the camera about 2-3 feet from yourselves (might have to sit close together, oh darn!)
If all goes well you will get a proper shot with a proper depth of field and lighting
Once you get the shot put in a video software and add the color temperatures you want. I think he (your reference video) used 4900K to create a peachy warm color tone.
ok, I’m going to start over, now that I saw your video.
The absolute most important part about video is the lighting. Lighting is to video as acoustics is to audio. And just like most untreated rooms have sound issues, almost all residential have lighting that looks bad on video.
You can get creative with lighting and come up with some pretty cool lighting effects, but the first thing to do is understand the basics. Your typical talking head, 3-point lighting setup is a good place to start.
You can get cheap lighting kits on ebay that will work way better than your standard room lighting. 3 lights with stands and umbrellas can be had for $50. I like using daylight colored lights so that I don’t get wonky lighting changes when mixing with sunlight.
I have been shooting bands for my TV show for 4 years in some pretty rough lighting situations. Here is my take on this:
Assuming the camera model is correct, you will have little control over the ability of the lens to shoot in low light. The lens is fixed at f2.8, which will shoot in a indoor setting but you are going to need a decent amount of lighting to keep the shot from getting grainy. Even in low lux mode you are going to want additional lights. Look up not only fill and key lights, take a look at hair lights. They essentially light softly from above so that you can see the outline of the head. You are equipment limited with that camera. I would do some test shots with the iPhone to see what can be done with it. One good thing about the iPhone is it shoots in a normal width, not the 120 degrees that the Sony does. That means that it will not cause straight lines at the edge of the frame to curve, a byproduct of the wide angle lens.
What you do have control over is your lighting and post production tricks to help make the video pop. Get as good a shot as you can and then move to post to adjust.
3 Likes
Awesome, thanks for all the tips. I’m still waiting for a light fitting for my big bulb, but last night I scrounge a big security light off a neighbour and did some experiments. I ended up with lots of light on the back wall (I was about 8 ft away), so I think I need to put up a screen or something to direct the light a bit more.
I’ll do that this evening and post my results…
BTW, what video editing software are you using?
I have ‘Cyberlink PowerDirector’ which I have mucked about with and has various tools for colour grading etc, although I’m no expert…sometimes it feels a little naff to me!
I use Sony Vegas and Adobe Aftereffects. I put together some basic video tips in this thread that might be helpful starting fresh. Its better to start right than to just find something that works temporarily.
If you have any questions feel free 
Van Halen in their early days used to steal colored landscape lights from neighborhood apartment buildings for their stage lighting. Not suggesting that of course, but your post made me think of that!
Ok, so I’m still waiting for the fitting for my big bulb to come, but in the meantime I took in the outside light and shone it at my face as an experiment.
Here is the raw result
Then I messed around with ‘colour grading’, to get to this.
Obviously neither are great, but slowly improving on the first video (I hope).
As ever, this isn’t about the sound or anything (yet), but rather the lighting & trying to get a decent quality shot.
Some things I noticed:
-
I think the grainy-ness is not as bad as the last video, though not by much. The exposure was set quite high and I could put it high still (without knowing really what to do, I just increased it until the little green light in the bottom right stopped looking like it was flashing…)
-
With the light shone on me there was a lot of light on the back wall which isn’t good since I’m trying to go for a ‘dark room’ look. I dont’ have any screen handy so I put up a blanket on a mic stand and tried to use that. It did indeed cause a big shadow to be cast on the wall but a lot of light was still getting through
-
Perhaps I should be aiming the light slightly down towards the subject, rather than up?
-
I only had two small candles and boy don’t they look smaller on film? So, I’ll need BIG candles. If I want candles.
-
The Sony camera is slightly annoying with its 120 deg field of view which is too much. I cropped it in PowerDirector as much as I could but still. Also cropping causes it to zoom which I think loses a bit of quality
-
Given the massive field of view, it is incredibly hard to find anywhere in our room that doesn’t look completely cluttered! I think we will have to do a bit of rearranging to get some blank walls or something…
If it were summer we could sit outside as we have a nice, rustic looking long white wall around the garden. But its not.
How to keep the light on me/us and not everywhere else?
Also, I had a 30W LED light on me there, which is about equivalent to 150-200W incandescent (I think it was something like 1600 lumens). @FluteCafe you mentioned 300W so I guess when the second bulb fitting arrives I’ll have just enough.
Buuuutt…how the hell do you avoid blinding yourself?!!  I was seeing stars all evening cause of that single light. Somehow it feels way brighter than being on stage…
1 Like
You could try and raise the light higher, so that it isn’t shining directly in your eyes.
Light spill can be minimized by the use of a barn door mechanism. A DIY unit would probably be easy to make.

That would allow to help shape the area being illuminated.
1 Like
There are still overexposed zones in your new shot, so camera is still drinking too much light. I notice your camera has a spot light scene setting. Try using that maybe? It should fix the overexposed zones on your face. I dont think the camera allows you to manually change shutter speeds, so you might want to give spotlight scene a try.
Your camera has a Wide-angle 120° Carl Zeiss® Tessar® lens according to specs
fixed at 18.2mm and 2.8 aperture. Which means you have about 1/3 ft of depth of field with camera placed 2 feet from you. Try to keep the camera around 1 to 3 feet from you. Clutter behind should go slightly blurry after 3ft from the camera. Don’t worry too much about the wide angle, its better not to crop the video because your camera records soft 1080p which means it is in reality 720p and any zooming will mess with the quality.
Turn off the Auto Backlight as well.
Dont worry too much about the wide angle, just try sitting closer and clear up the clutter. You also need more ambient light in the back than the 2 candles and a lamp. maybe throw some ropelighting or christmas lights on the floor that is not visible in the shot. Your key light is pushing light behind you into the ambient zone. You might want to have the key light come at a more oblique angle and use another soft light on your face.
Diffusion paper is quite cheap, you can use it to turn a hard light into a soft light.
Soft lighting or diffused key(main) light helps there preferably with barn doors. A soft key light close to your face should do the trick. Your LED hard light will push too much light onto the ambient scene.
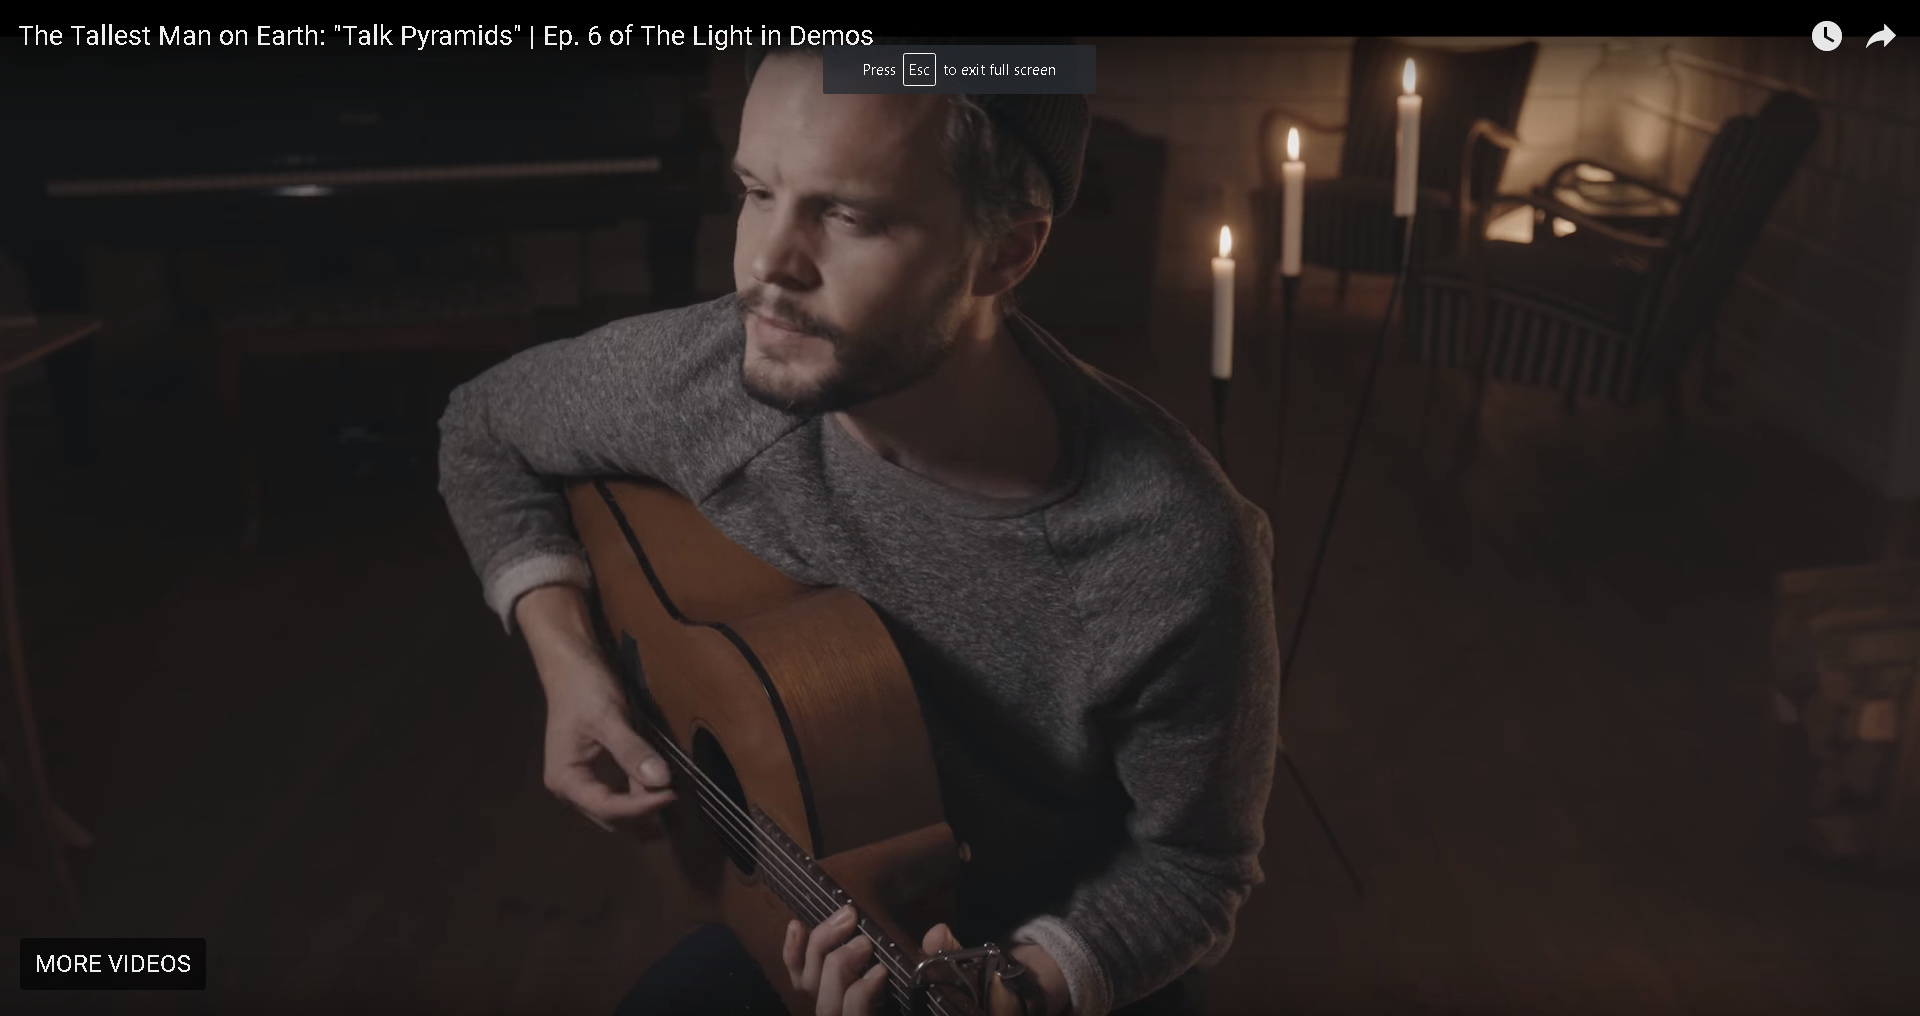
You want something like this look right?
Thats a moderately soft light on my face and ambient strand light in the back about 3ft. A shallow 0.3ft dof
This one is an example I pulled online from Aputure, not a big fan of their products but I do like this shot. He has 2 open bulb lamps with soft glow about 4 feet from him and he has 1 soft key light on his face, maybe 2 more dim Fresnels off to each of his sides. He is using most likely a 50mm lens with a 1ft depth of field. You might not have too much flexibility with depth of field in your camera but keeping your camera close to yourself you might get a similar shot to this.

You are getting a lot closer. You are still overexposed a bit on parts of your face. Bring down your exposure a bit more if you can. It will do a couple things:
- make your background darker
- Prevent your face from clipping
- Make your face shadows even darker.
#3 is the part is the only downside. You can fix this with a soft light to the other side of your face. It should be there just to fill in those shadows. You’re going to want to pay attention to your eyes, because they are deep set and prone to dark shadows.
I dont think he has many options in his camera to do that. I looked up the specs and you cannot change aperture or shutter speed. Backlight control is a possibility but it will add noise.
His lens is 18.2mm at 2.8f so it needs to be pretty close to get a decent dof.
He does have a “spot light” setting on his camera that can work reduce the hot zebras on his face. Other than that, he has to rely on external lights.
2 Likes
Yes I agree. I also looked at his camera specs and he is limited to a handful of pre-defined modes and a fixed aperture.
I think he will be able to get closer to his desired effect playing around with light sources and modifiers.
He might as well learn some lighting techniques, even if he decides to upgrade to a DLSR, it will pay off in future
endeavors.
1 Like
I can change exposure… I’ll try with the spot light setting as well